Mermaid Git Graph: Syntax, Examples & Templates
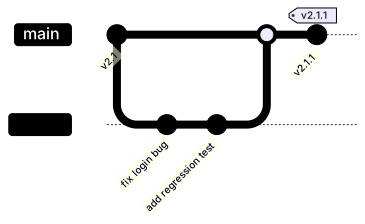
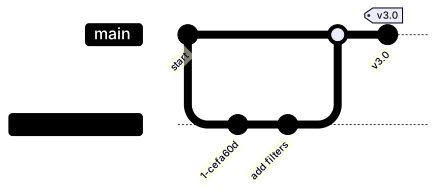
A gitgraph draws a repository’s branch structure as it would appear in a graph viewer: commits in order, branches splitting off, and merges joining back. It is the clearest way to document a branching strategy — release flow, hotfix policy, feature branches — without a whiteboard.
Basic syntax
The declaration is gitGraph (one word, capital G). commit adds a commit to the current branch; commit id: "init" gives it a visible label. branch develop creates a branch and switches to it, checkout main switches back, and merge develop merges the named branch into the current one. Tags ride on commits with tag: "v1.0". The default branch is main, and it exists before you write anything, so the first line after the declaration is usually a commit on main.
Branches, commits and merges
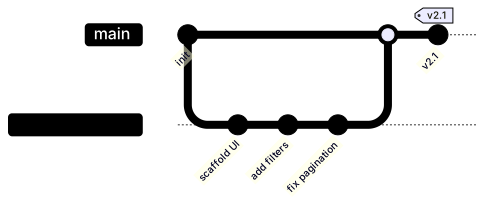
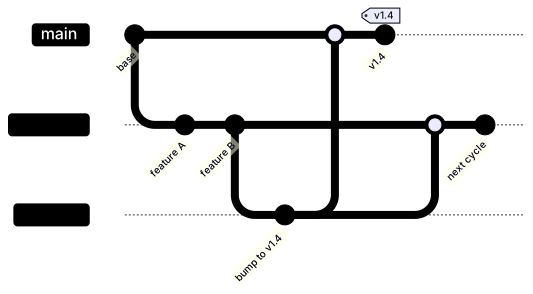
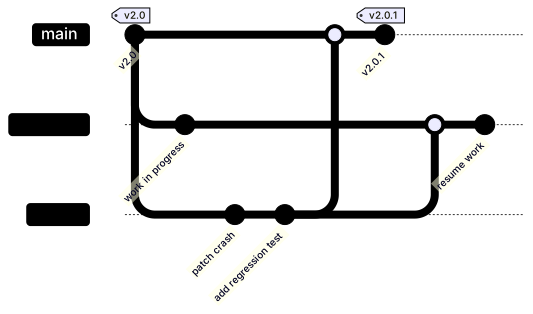
Read the diagram as a history: time flows left to right, parallel lines are parallel branches, and a merge is drawn where the lines rejoin. The hotfix example shows the canonical pattern — a release commit, a branch for the fix, the fix commits, a merge back to main, and a tagged patch release. When documenting your team’s process, mirror the real commands: every branch line should correspond to a git branch someone actually runs, and every merge to an actual merge or pull request. Unlabeled commits are fine for filler history, but label every commit a reader might need to reference.
Common gotchas
checkout switches branches but does not create them — writing checkout hotfix before branch hotfix is an error. Merge direction matters: merge hotfix merges hotfix into the current branch, so check out the target first. Labeled commit ids must be unique, and a tag attaches to the most recent commit on the current branch, so order the lines carefully. Branch names with hyphens work, but keep them short — long names widen the diagram fast. Finally, a gitgraph is documentation, not a log: simplify history ruthlessly, because a diagram with forty unlabeled commits communicates nothing.
Tips for mobile editing
Label only the commits that matter and leave the rest unlabeled; every id: clause is extra typing on a phone keyboard. Write the main-line commits first, then add branches one at a time, rendering after each to confirm the merge landed where you expected. Keep branch names to one lowercase word where you can. The cheatsheet lists the four keywords and their arguments.
Branch diagrams describe code history; for the work that produces those commits on a calendar, use a Gantt chart, and for the decision logic around deploying them, a flowchart.
Git Graph templates
Every template opens in the editor with the code pre-filled — edit it on your phone or desktop.